E4S
Neopixels
Material for a UC Irvine course offered by the Department of Physics Astronomy and developed by David Kirkby.
Introduction
Neopixels are devices that contain separate red, green and blue LEDs that can be individually controlled. Each neopixel has some simple on-board processing to enable all three LEDs to be controlled via a single digital output. Even better, multiple neopixels can be chained together using a single digital output for control since each pixel knows its position in the chain and will pass on any instructions meant for a later pixel.
A neopixel is an example of what is known generically as an RGB LED. Our neopixels are based on the WS2812 device. Some microcontrollers have a single neopixel included but the Pico does not. Instead, your kit contains a strip of 8 neopixels that we will use.
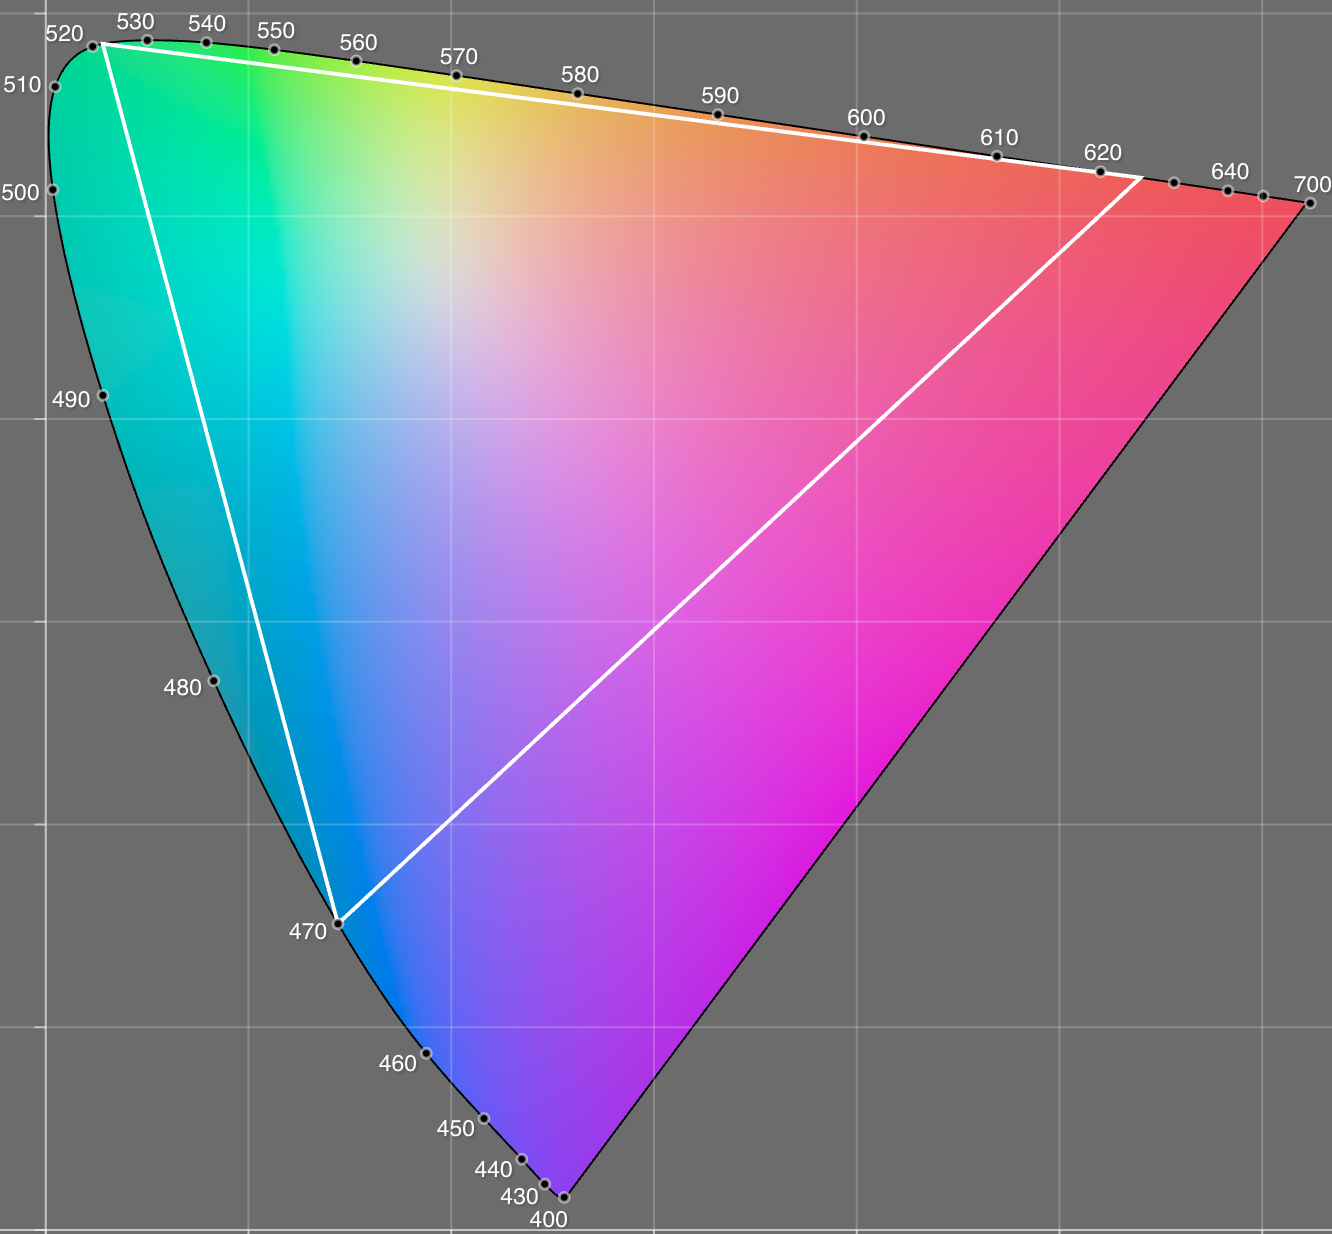
Study the datasheet to determine the wavelengths of the individual R,G,B LEDs in a neopixel. What is the physics behind mixing these wavelengths to produce colors such as pink or brown? A chromaticity diagram is a helpful way to visualize this mixing process.

Explore this interactive page to see how the R,G,B wavelengths determine which mixture colors can be reproduced.
Test the Kit Neopixel Strip
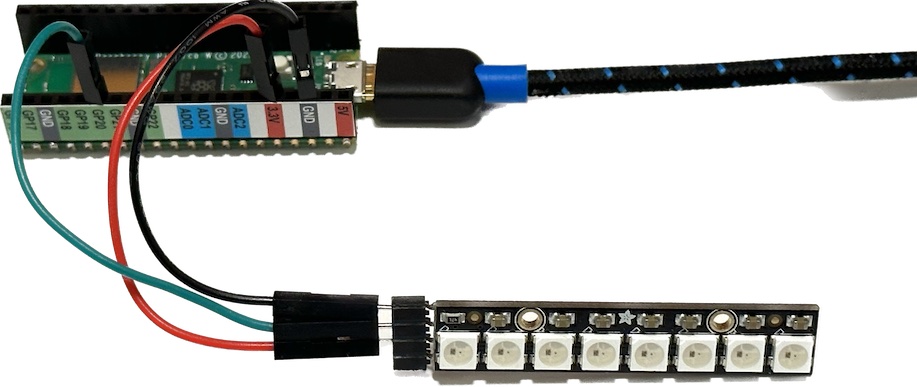
Build the following circuit to get started:

Note that we are connected the Pico 3.3V pin to 5VDC on the strip: this is not a mistake and is necessary for this circuit since this voltage determines the logic levels used to communicate with the neopixels.
Here is some code to implement a “marching LED” for testing:
import time
import board
import neopixel

# Initialize communication with the neopixel strip using a single digital output.
NLEDS = 8
leds = neopixel.NeoPixel(board.GP20, NLEDS, auto_write=False)
leds.brightness = 0.02

# Define the LED states to use as (R,G,B) each in the range 0-255.
OFF = (0, 0, 0)
ON = (255, 0, 0)

while True:
    # Cycle through LEDs to turn on, one at a time.
    for i in range(NLEDS):
        for j in range(NLEDS):
            leds[j] = ON if i == j else OFF
        # Changes to led[] do not take effect until led.show()
        leds.show()
        time.sleep(1)
Read through the comments for hints on controlling neopixels. Note that we use a library to handle the communications with the chain of pixels.
Using auto_write=False in the initialization means that changes to the LEDs do not take effect until led.show() is called. Try commenting this out to see what happens. Next, try auto_write=True with led.show() still commented out. In this simple example, auto_write=False and led.show() are not really necessary, but they do improve performance when many neopixels turned on or off at once.
The example above uses a relatively low brightness of 0.02. The reason for this is that turning on all 8 LEDs at maximum brightness (1.0) would require 480mA to be supplied. However, the Pico W datasheet recommends not exceeding 300mA. What might happen if you exceed this? You probably would not do any permanent damage, but would cause the USB power to drop sufficiently that the Pico would reset and stop running its program. Your laptop operating system might also complain about excessive current draw on its USB port.
If you turn over your neopixel strip, you will notice copper pads labeled GND, DOUT and 5VDC. If you were to connect these to GND, DIN and 5VDC of a second strip (e.g. using soldered jumper wires), you could then set NLEDS = 16 in your code and control both strips at once.
Exercise 1
Look up the R,G,B values (0-255) of your favorite color here and use them for the ON state. Can you see the individual red, green and blue LEDs in the device? How well does the LED mixture match the color you expected?
Exercise 2
Connect your joystick to an analog input and use its left-right motion to control which of the 8 neopixels is illuminated, using a scheme of your design.
Exercise 3
Building on the previous exercise, use the joystick up-down motion to control the brightness of the single illuminated neopixel.